In our previous post, we saw how to authenticate to a CodeCommit repository using HTTPS. Now, let’s understand how to authenticate using SSH. This method requires a private-public key pair for authentication.
The prerequisites to this method are,
An IAM user with the policies or permissions required for CodeCommit.
Git client installed on your local machine.
Knowledge of SSH.
Follow the steps once the requirements are in place.
Open the terminal on your local machine. Execute the ssh-keygen command to generate an SSH public-private key pair and follow the instructions.

Note: I did not set any passphrase
The above command will create a public and a private key file in the .ssh directory by default under the user’s home directory or the keys will be saved in the directory the ssh-keygen command is executed.

Copy the contents of the public key file i.e., "codecommit-ssh.pub" .
Go to AWS IAM console > Users.
Choose the IAM user you want, and go to the security credentials tab.
Scroll down to the “SSH public keys for AWS CodeCommit” section and click “Upload SSH public key”.

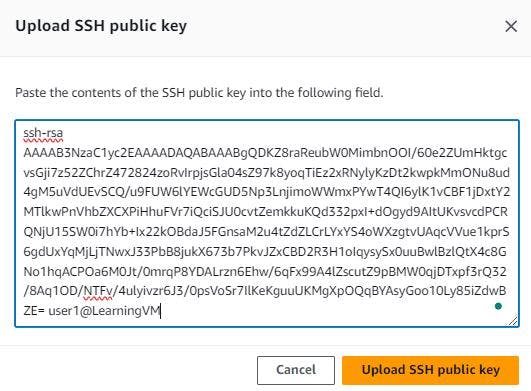
A window pops up on the screen. Please paste the public key copied in Step 3 and click on “Upload SSH public key”.

This creates an SSH key ID.

On your local machine, navigate to the .ssh directory in the user’s home directory, and create a file with the name “config” (without any extensions).
Below is the config file:
Host git-codecommit.{AWS_region_where_codecommit_repo_resides}.amazonaws.comUser {SSH_key_id_thats_generated_after_uploading_SSH_public_key}IdentityFile ~/.ssh/codecommit-ssh
The file says that we want to connect to the AWS CodeCommit server in a particular region with a user having the ID (generated in Step 8) and the user’s password/private key stored in the "codecommit-ssh" file in the user’s .ssh directory.

Note: The file content should follow the same syntax. I tried to keep it in one line and it did not work.
Ensure only the user has read and write permissions on the config file.
chmod 600 config
Run the following command to test the connection and configuration.
ssh git-codecommit.{AWS_region}.amazonaws.com
Once the test connection is successful, copy the SSH clone URL from the repository and clone the repo to your local machine with the git clone command.
git clone (paste_the_ssh_clone_url_of_the_repo}

Now, we are successfully authenticated to our CodeCommit repository using SSH.
The authentication is successful, and the remote CodeCommit repository is copied to our local. You can create new files and push them back to the CodeCommit repository.
Switch to the DemoRepo directory, create a new file, and add some content.
 cd DemoRepo
 touch sample-file-ssh
 echo "This is a sample file pushed using SSH keys for CodeCommit" > sample-file-ssh
 cat sample-file-ssh
Check the git status which shows an untracked file in the working directory.
git status
Let Git track the file by adding it to the Git staging area.
 git add .
 git status
Now, commit it to the local repository and then push it to the remote repository. Key in the credentials if asked.
git commit -m "your message"
git push
Navigate the remote repository via the AWS CodeCommit repository console and refresh the page, you should see the file.

Note: We see the file pushed using HTTPS as we did not change the repository. Also, if you follow this after the HTTPS method, delete the directory cloned via HTTPS before cloning via SSH.
We have successfully connected to the repository, cloned it, and pushed files to it.
Happy Learning!

